I am so excited about learning tatting. My Aunt Lorraine is teaching me the craft. I took photos of some of her pieces in a previous post.
All you need to start out is a shuttle and string. The string here is pearl cotton, size 12.
Step 1: Wind the string onto the shuttle. I forgot to take a picture of this process, but it is easy. There is a small hole in the center of the shuttle. (You can't see it because it is covered with string.) Thread the string through this hole and tie a knot to secure. There are small spaces on either end of the shuttle where the plastic meets. The string slips right in between for winding and unwinding.
Below is what I'm making in this lesson.
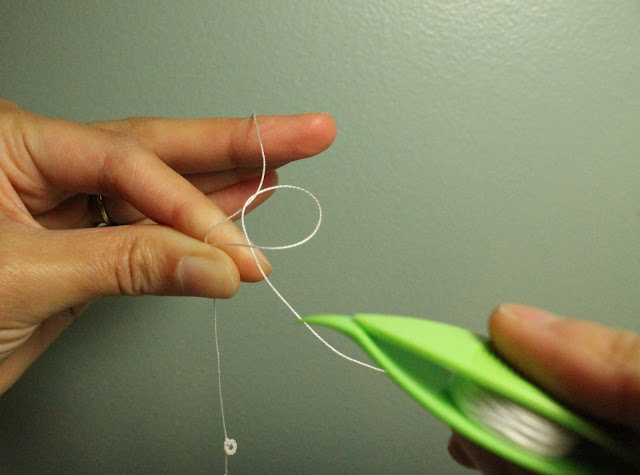
Step 2: Hold the string as seen below, with the tail hanging down.
Step 3: Wrap the string around the rest of your fingers and hold onto this end also. The string forms a big loop around your fingers.
Step 4: This first knot is the "under knot." (That is not an official name, but what I will call it here.) Bring the fingers of your shuttle hand under the string as seen below.
Here is a view of the shuttle hand from the back side to help clarify:
Step 5: Guide the shuttle under the string between the index and middle fingers of your non-shuttle hand.
Step 6: Guide the shuttle back over top of the string of the non-shuttle hand and pull through.
Here is the pull-through. Keep the string in the left hand loose while pulling the shuttle string tight.
Step 7: Pull the string until the knot is near your index finger and thumb as seen below.
Step 8: Now for the "above knot," as I'll call it. Guide the shuttle over the top of the string in your left hand.
Step 9: Then bring it under the string and pull it through.
Remember to keep the string in your left hand loose, while the shuttle string is tight.
Use the middle finger of your left hand to help tighten the knot after the string has "flipped." This is very difficult to explain without actually showing it in person. If the string hasn't flipped and you tighten the knot anyways, you will know you have made a mistake when the knots do not budge when you pull the shuttle string to create the loop.
After you have made multiple "under" and "above" knots in a row, you simply pull the shuttle string until a loop is formed. (If the string is stuck that means at some point a knot wasn't allowed to flip before tightening. You will have to try to undo the knots, or just cut it off and start again.) See the photos below for forming the loop:
Finished loop:
Someday I will be making these:
For now I'm just making a lot of these:
These pictures might not be enough! There are over 2,000 videos on YouTube that show tatting in action.


Damn that looks hard!
ReplyDeleteBut pretty
Thanks for a grreat read
ReplyDelete